


To apply thermal paste, place a small amount at the center of the CPU heat spreader, then mount the cooler so its pressure spreads the paste into a thin, even layer. The goal is full contact between the CPU and the cooler base with as little paste as possible doing the job.
The process is short, but the details matter. Too much paste, a loose cooler, or skipping the cleaning step can all raise temperatures. I based this guide on manufacturer manuals and spec sheets, published standards such as ATX, and widely documented PC building practice.
When You Need to Apply Thermal Paste
You need fresh thermal paste any time you separate a CPU from its cooler. That includes a new build, a cooler swap, a CPU upgrade, or a deep clean where the cooler comes off. The old paste hardens and collects dust over time, and remounting a cooler without replacing it leaves gaps that hurt heat transfer.
You do not need to reapply paste just because a PC is a few years old. If temperatures are stable and the cooler has never been removed, leave it alone. Reapplying is only worth the effort when the cooler is already off or when you have a real reason to suspect mounting or paste problems.
Signs the Paste or Mount Needs Attention
- The cooler was removed and the old paste is dry, cracked, or uneven.
- You are installing a new CPU or a new cooler and the base has no pre-applied paste.
- Temperatures climb quickly under load and the cooler is firmly mounted.
- You notice the cooler shifted during shipping or a move.
If you are still choosing a cooler, my roundup of CPU coolers for gaming covers the air and liquid options that pair well with a careful paste job. The application steps below apply to both types.
What You Need Before You Start
Gather everything before you open the case so you are not hunting for supplies with the PC exposed. A clean, well-lit work surface helps more than any tool.
- Thermal paste. A small tube is enough for several applications. My roundup of thermal paste covers the consistencies and trade-offs to compare.
- Isopropyl alcohol at 90 percent or higher, plus lint-free cloths or swabs for cleaning.
- The cooler and its mounting hardware, with the manual nearby.
- A screwdriver that matches your cooler and case fasteners.
- An anti-static wrist strap or a bare metal touch point on the case for grounding.
Check the cooler manual for whether the base already has paste applied. Many stock and budget coolers ship with a pre-applied patch, and adding more on top of it is a mistake. If the base is bare, you supply the paste.
Before opening anything, shut down the PC, switch off the power supply, and unplug the power cable. Ground yourself by touching bare metal on the case or by wearing an anti-static wrist strap. Follow the motherboard and cooler manuals for socket orientation, mounting hardware, and compatibility.
[cog_pick asin=”B0BFF1T9PD” guide=”1263″]
How to Apply Thermal Paste Step by Step
- Shut down and unplug the PC. Switch off the PSU, pull the power cable, and ground yourself before touching any components.
- Remove the cooler. Loosen the mounting hardware in the order the manual specifies. Lift the cooler straight up so you do not smear old paste across the socket.
- Clean the CPU and cooler base. Wipe away old paste with isopropyl alcohol and a lint-free cloth. Let both surfaces dry fully. Any leftover film or dust creates a barrier.
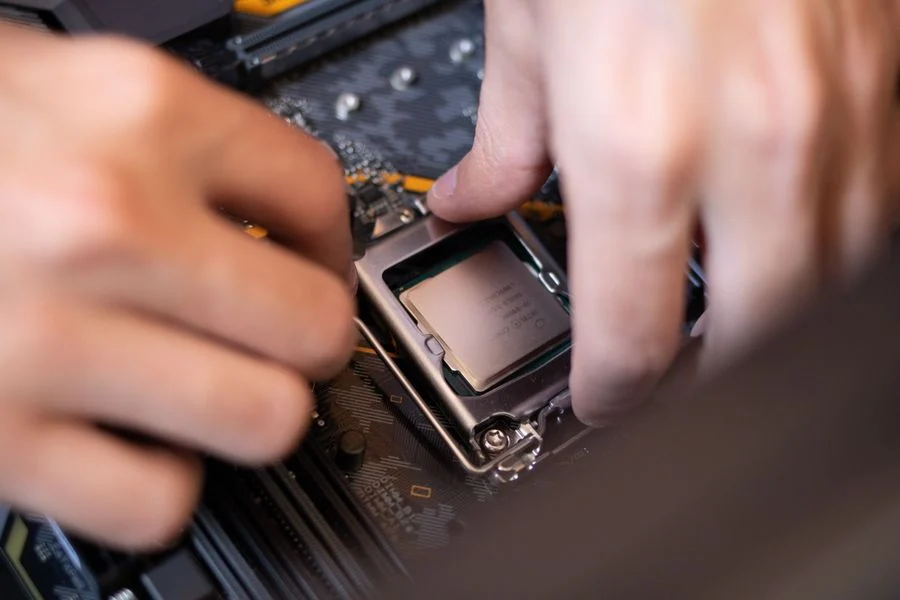
- Check the socket and CPU seating. Confirm the CPU sits flat and locked in the socket per the motherboard manual. Do not touch the pins or the contact pads.
- Apply a small amount of paste. Place a dot about the size of a grain of rice at the center of the heat spreader. For large desktop CPUs, a thin line down the middle also works. More paste is not better.
- Mount the cooler with even pressure. Lower it straight onto the CPU and tighten the mounting screws in the pattern the manual shows, a little at a time. Even pressure spreads the paste; tightening one side fully first tilts the base.
- Reconnect and test. Reattach the cooler fan header, close the case, plug in the power, and boot. Check temperatures in the BIOS or a monitoring tool at idle and under load. If they are high, reseat the cooler before assuming the paste is the problem.
The dot and line methods both work because mounting pressure spreads the paste. The exact shape matters less than the amount and the even mount. A pea-sized amount is a common reference, but small CPUs need less and large heat spreaders can take a little more. When in doubt, start small.
| Situation | What To Do |
|---|---|
| Pre-applied paste on the cooler | Mount as is. Do not add more paste. |
| Bare cooler base | Apply a rice-grain dot or thin center line. |
| Reusing a cooler after removal | Clean both surfaces and apply fresh paste. |
| Liquid cooler with a cold plate | Follow the cooler manual for the base and mounting. |
Common Thermal Paste Mistakes
- Using too much paste. Excess paste can squeeze onto the socket edge or motherboard and makes a mess. It also does not improve contact. A thin, even layer is the target.
- Skipping the cleaning step. Old, dried paste left on the CPU or cooler base creates uneven contact. Clean both surfaces with isopropyl alcohol and let them dry.
- Tightening the cooler unevenly. Cranking one screw down fully before the others tilts the base and leaves one side with poor contact. Follow the manual's pattern and tighten gradually.
- Forgetting to ground yourself. Static discharge can damage components without any visible sign. Touch bare metal or wear a wrist strap before handling the CPU and cooler.
- Adding paste on top of a pre-applied patch. Doubling up on paste is unnecessary and can cause overflow. Check the cooler base first.
When to Stop and Get Help
Most paste jobs are straightforward, but a few situations call for a second opinion. If the CPU is stuck to the cooler and will not release, do not pry it with force. Bent pins or damaged contact pads can turn a simple job into a dead system. Ask an experienced builder or a repair shop to separate them.
If temperatures stay high after a clean, careful mount, the cause may be airflow, fan curves, or a cooler that is undersized for the CPU. Check the motherboard and cooler manuals, and confirm the fan header is connected. For warranty questions about a cooler or CPU, contact the manufacturer directly.
Frequently Asked Questions
How much thermal paste should I use?
A dot about the size of a grain of rice at the center of the CPU is enough for most desktop processors. Mounting pressure spreads it into a thin layer. Small CPUs need less, and large heat spreaders can take a little more.
Can I apply thermal paste without removing the cooler?
No, the cooler has to come off so you can clean the old paste and apply fresh paste to the CPU. Adding paste on top of an installed cooler does not reach the contact surface and can make a mess.
Do I need to reapply thermal paste every year?
No, thermal paste does not need a yearly change. Reapply only when the cooler is removed, when you install a new CPU or cooler, or when you have a real reason to suspect the mount or paste is failing.
What happens if I use too much thermal paste?
Excess paste can squeeze out around the socket and make cleanup harder, but it does not improve cooling. The bigger risk is a messy application. A thin, even layer from a small dot is the safer approach.
Final Thoughts
The single most important takeaway is that thermal paste works through even mounting pressure, not through volume. Clean both surfaces, use a small amount, and tighten the cooler gradually in the pattern the manual shows.
If you get those basics right, the paste does its job quietly and you can move on to the rest of the build.

