


You build a gaming PC by matching parts to your target resolution and case, assembling them outside and inside the case in a set order, and booting only after every connector and standoff is checked. The process rewards patience more than speed, and most failures trace back to a missed cable or a part chosen without reading the manual.
I based this guide on manufacturer manuals and spec sheets, published standards such as PCIe, USB, and ATX, and widely documented PC building practice. You do not need prior experience, but you do need to read the paperwork that comes with your motherboard, cooler, and power supply.
When Building Your Own Makes Sense
Building your own gaming PC makes sense when you want control over each part, plan to upgrade later, or need a specific combination of case size, cooling, and noise that prebuilt systems do not offer. It also teaches you how the machine works, which helps when something fails and you need to troubleshoot.
A prebuilt can suit you better if you want a single warranty contact, do not want to handle returns on individual parts, or need a working machine immediately. The trade-off is less choice and often less clarity about which components are inside.
Platform matters too. Intel and AMD boards differ in socket and chipset, and Windows and macOS support different hardware. Decide your resolution target first, because a 1080p build and a 1440p build do not need the same graphics card. If you are aiming higher, my roundup of graphics cards for 1440p gaming is a useful place to compare options before you commit.
What You Need Before You Start
Gather your parts and tools before you open anything. Working on a clean, well lit table with a large nonconductive surface keeps small screws from disappearing and gives you room to lay out the case panels.
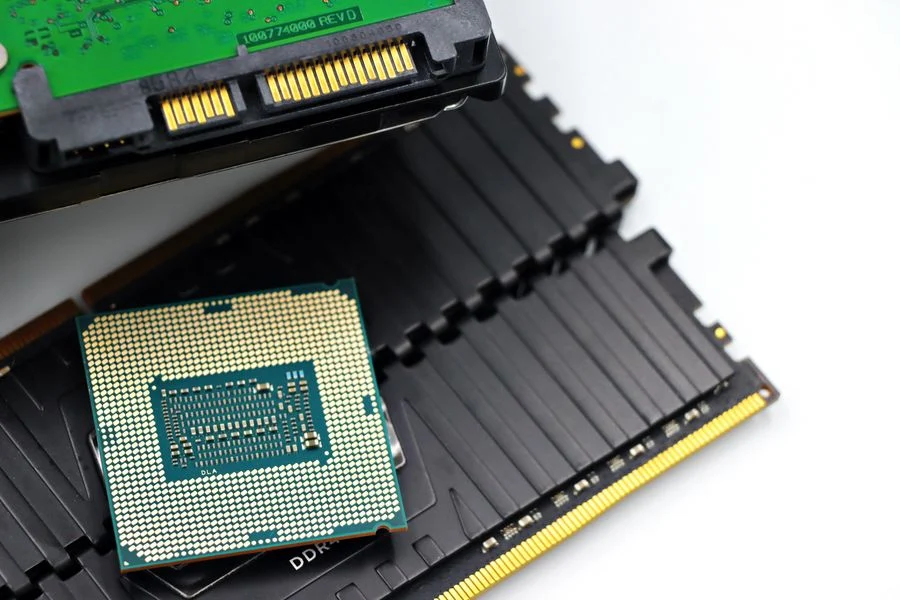
- Core parts: case, motherboard, CPU, CPU cooler, memory, graphics card, storage, power supply, and case fans as needed.
- Tools: a Phillips screwdriver that fits your screws, a small cup or tray for screws, and an anti-static wrist strap or bare metal to touch for grounding.
- Paperwork: the motherboard manual, case manual, cooler installation guide, and power supply manual. These list slot locations, connector names, clearance limits, and supported memory speeds.
- Software: a USB drive for the Windows installer and a second drive or folder for motherboard drivers and a BIOS file if you plan to update.
Check compatibility before assembly. The CPU socket must match the motherboard, the memory type must match the board (DDR5 boards need DDR5), the cooler must fit the socket and the case, and the graphics card length and cooler height must fit the case. Product and system specific values such as supported memory speed, power supply wattage, clearance, and weight capacity come from the manufacturer manual or spec sheet, so read those pages rather than guessing.
How to Build a Gaming PC Step by Step
Follow this order to reduce the chance of installing a part and then having to remove it. Shut down and unplug any existing PC before you open it, switch off the power supply, and ground yourself by touching bare metal on the case or by wearing an anti-static wrist strap before you handle components.
- Prepare the case and workspace. Remove both side panels, take out the accessory box, and identify the standoff locations for your motherboard size. Install standoffs only where the board has mounting holes, following the case manual.
- Install the CPU. Lift the socket lever, align the notch on the CPU with the socket marking, and lower it straight down without pressing. Close the lever and follow the motherboard manual for any socket cover removal.
- Install the memory. Open the retention clips, align the notch on each stick, and press until the clips click. Use the slot pair the motherboard manual recommends for two sticks, and do not force a stick in backward.
- Mount the CPU cooler. Apply thermal paste as the cooler manual directs, then attach the cooler with the correct bracket for your socket. Tighten screws in a cross pattern a little at a time so the pressure stays even.
- Install the M.2 storage. Remove the heatsink or screw, slide the drive into the slot at a slight angle, press it flat, and secure it. Reinstall the heatsink if your board uses one.
- Mount the motherboard in the case. Lower the board onto the standoffs, line up the rear ports with the case cutout, and start all screws by hand before tightening them. Do not overtighten.
- Install the power supply. Place it in the case with the fan orientation the case manual recommends, and secure it with the screws provided. Route the main cables toward the motherboard before you add more parts.
- Connect front panel and internal cables. Attach the 24 pin motherboard cable, the CPU power cable, front panel headers, USB headers, and audio header using the motherboard manual as your map. Check that each connector is fully seated.
- Install the graphics card. Remove the case slot covers you need, release the PCIe slot latch, and press the card into the slot until the latch clicks. Secure it with the case screw and connect any power cables the card requires.
- Connect storage and fans. Attach SATA data and power cables if you use a 2.5 inch or 3.5 inch drive, and plug case and cooler fans into the headers named in the manual. Keep cables away from fan blades.
- Do a first boot check. Recheck every connector, confirm no loose screws sit on the board, and plug the monitor into the graphics card rather than the motherboard. Power on and enter the BIOS to confirm the CPU, memory, and storage are detected.
- Install the operating system and drivers. Set the boot order to your USB installer, install Windows, then install the motherboard chipset, network, and audio drivers from the manufacturer support page. Run Windows Update afterward.
If you plan a BIOS update, do it with a stable power source and never interrupt it. An interrupted BIOS update can leave the board unusable, so follow the motherboard manual exactly and wait for the confirmation message before you restart.
Common Mistakes to Avoid
- Forgetting a standoff or adding an extra one. A missing standoff can flex the board, and an extra one can short the underside. Count them against the board holes before you lower it in.
- Skipping the manual for memory slots and front panel headers. Using the wrong slot pair can prevent the board from running at its supported speed, and a misplaced front panel connector leaves the power button dead.
- Plugging the monitor into the motherboard. On a system with a graphics card, the motherboard video port may not output at all. Use the ports on the card.
- Reusing power supply cables from another modular unit. Cable pinouts are not universal, and mixing them can damage parts. Use only the cables that came with your power supply.
- Interrupting a BIOS update or ignoring thermal paste guidance. Both mistakes cause avoidable failures. Follow the cooler and motherboard instructions and let the update finish.
When to Get Help or Buy Prebuilt
Call a professional or choose a prebuilt system if you are uncomfortable handling expensive components, if a part arrives visibly damaged, or if the machine will not post after you have rechecked every connector and the manual. A local shop can test parts you cannot swap yourself.
You should also stop and ask for help if you need a warranty repair, because opening a prebuilt case can affect coverage. For warranty, software licensing, and data privacy questions, check the manufacturer or software publisher terms rather than relying on forum posts.
For pain or discomfort while building or gaming, speak with a doctor or physical therapist rather than trying to fix it with gear.
Frequently Asked Questions
What order should you build a gaming PC in?
Install the CPU, memory, and cooler on the motherboard first, then mount the board in the case and add the power supply, storage, and graphics card. This order keeps the most delicate parts accessible and avoids removing parts later.
Do you need an anti-static wrist strap to build a PC?
An anti-static wrist strap is a sensible precaution, but touching bare metal on the case before handling parts also helps equalize charge. Avoid working on carpet in dry conditions and handle boards by their edges.
How do you know if PC parts are compatible?
Check the CPU socket against the motherboard, the memory type against the board, and the cooler and graphics card dimensions against the case. Manufacturer manuals and spec sheets list supported memory speeds, clearances, and power requirements.
What should you do if the PC does not turn on after building?
Recheck the 24 pin and CPU power cables, the front panel power header, the graphics card seating, and the power supply switch. Confirm the monitor is connected to the graphics card and that the memory sticks are fully clicked in.
Final Thoughts
The single most important takeaway is to plan compatibility and follow the manuals before you screw anything down. Most build problems come from a missed connector, a wrong memory slot, or a part that did not fit, not from defective hardware.
Take your time, ground yourself, and test the core parts before you close the case. A careful first boot saves hours of troubleshooting later.
